My lack of the proper colors of thread for my latest quilting project seems to have gained me an unexpected benefit. While waiting for the thread to arrive I read a blog post from Karen Marchetti on the topic of basting. Here's the posting which details how Karen bastes the entire top before starting her quilting. I think it's the answer to many of the problems I have been struggling with this summer in my quilting. So my first step became to baste the entire quilt. Took me about an hour and since I don't have a basting feature on my machine I did the next best thing and biggie sized some stitches lengthwise about every four to five inches.
My quilts are very square so my issue was not working in excess fabric on the front...it was turning the quilt on the frame and having the backing constantly tucking when I tried finishing the quilting on the border. On the last quilt, I tried hand basting the last 14 inches on the two sides that I needed to finish. It worked but I knew there was a better the way! The other advantage to this technique is no hanging batting...I have a front roll and a back roll which gets everything out of my way. I can advance forward and roll back as I make thread color changes. Very hard to do that with the traditional loading of a quilt. I also love that I can easily look underneath and check the backside easily.
Despite how great this new technique is going...I have still bitten off a huge quilting design with lots of ruler work which is terribly time consuming. I create these problems for myself...I just can't help it!!!
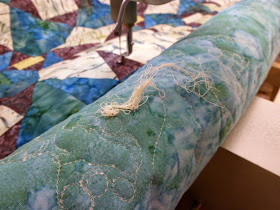
The tension has been stellar on this quilt...except for a wonky moment. I checked the backside and found this mass of thread.
It was my top thread...no idea how that came about but I had to reset the timing on my hook to get rolling again. Thankfully it was no big deal and I went right back to great tension.
Last night I did some work on the mini professional tote. We are supposed to get the outside shell and the inside lining done so we can join them in class tomorrow night. I had to put an inset zipper in...no problem...I got a handy tip at the last class for this process. First I had to create the faced hole for the zippered pocket. The blue and white fabric is my ironing board cover.
Then apply Wonder Tape to the back side to hold the zipper in place while sewing...pins would really be impossible through two layers of Dacor Bond that is adding nice body to the bag.
Peel off the paper backing from the Wonder Tape and you have a sticky surface to adhere the zipper in place while you stitch.
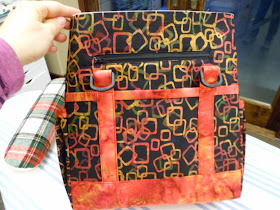
Magnificent! Zipper in place and top-stitched. As you can see I did get the outside of the bag completed.
And I got one part of the lining done, an interior zippered pocket.
The class instructor called to let me know I can come in as early as two hours before our class to get some extra instruction...I might be doing that!


What a gorgeous bag you're making! Thanks for sharing Karen's tips link. I don't have a longarm yet, but I definitely will sometime in the foreseeable future, so I'm soaking up every bit of advice that I can. :)
ReplyDelete